Feeds:
Posts
Comments

Archive for the ‘Machine Quilting’ Category

Ecclesiastes 3:11

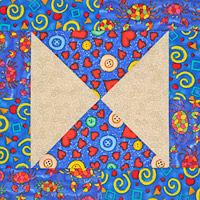
To complete the X-Box quilt top, I chose quarter-square triangles for the alternate blocks because I like the secondary design they produce.

Quarter-Square Triangle Block

You can follow my Quarter-Square Triangle tutorial to construct the four alternate blocks, plus the X-Box, Part Two tutorial for the block border.

First, make four quarter-square triangles.

Make Four Quarter-Square Triangle Blocks

Add borders to each block.

Position all your blocks in sewing order. Sew the blocks together in groups of three. I find it helpful to pin where seams need to match up.

Press the new seams of each row so that they butt up against the seams of the row they will be sewn to. For example, first row pressed to the right; second row pressed to the left; third row pressed to the right.

Sew the rows together. (I pressed the row seams open to distribute the bulk.)

Sew Rows Together

Add a contrasting border if you like.  My outer border measured 3 inches.

Add an Outer Border

Press the quilt top carefully, put together your quilt sandwich, and quilt as desired.

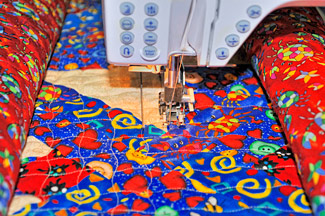
I quilted X-Box in a close diagonal grid pattern, using a wavy stitch and Valdani 50 wt. cotton thread (Color 6).  The stitching is about an inch apart.

Grid Quilting

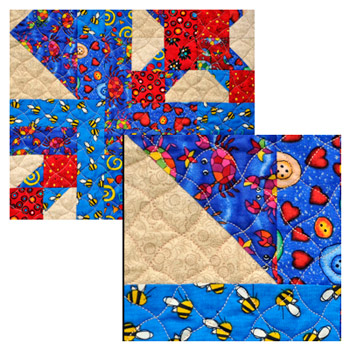
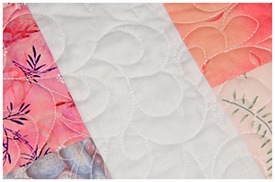
Here’s a close-up of the quilting.

Closeup of Quilting

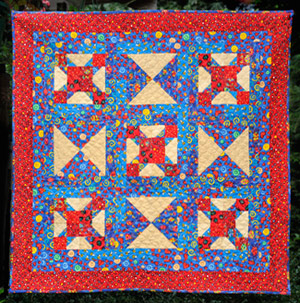
Another happy ending with a colorful quilt for a little boy (or girl).

X-Box Quilt

It’s seems so effortless to make quilts for girls since most fabrics just “work.”  Boy quilts, on the other hand, take a little more planning on my part.  Have you found this to be true?

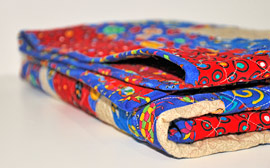
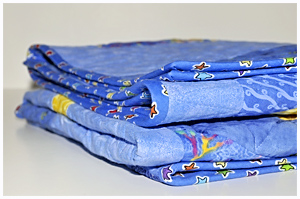
X-Box Quilt Folded

Have a great week of quilting!

Nancy

Read Full Post »

Psalm 119:89-90

With a quilt like Monkey See, the fabric served as the focus.  All that was required was a simple design that accentuated the cute little monkey faces.   I can foresee some little boy or girl adopting this “blankie” as their best bedtime buddy.
Monkey See Quilt

I grid quilted using a 5.0mm tight wavy stitch.  Valdani cotton quilting thread (50 wt.) was used on the front and back.  I really like the diamond pattern that this produced.

Grid Machine Quilting

It’s going to be difficult letting this one go!  I’ve thoroughly enjoyed keeping company with all those sweet little smiling faces.

Monkey See Folded Quilt

However, the fabrics are already pulled from the shelves for my next quilt.  I’ve even drawn the design in my quilt software.  Hopefully, I’ll have a rotary cutter in hand by this evening.

Happy quilting.

Nancy

Read Full Post »

James 3:17-18

This quilt came together with ease.  After arranging the blocks and sewing them together, I added a 5” border with corner squares.

Highland Snowball Quilt

I thought this quilt would be a good fit for a multi-colored binding.  I cut five strips on the cross grain of five different fabrics that I had used in the quilt top.

Cross Grain Binding Strips

I then sewed the strips together with diagonal seams.

Mark Diagonal Seam Lines on Strips

I pressed the long length of binding in half to form double-fold binding.

Double Fold Binding

When I came to the end of my binding tail, I removed the quilt from the machine and marked an overlap of 2 1/8” since that was the width that I cut my binding.

Mark Binding Tail

I trimmed off the excess and formed a 90 degree angle with the tails, right sides together, and marked the sewing line.  I then stitched the diagonal seam and trimmed the seam allowance to a quarter-inch, fingering pressing it open.

Place Tail Ends Right Sides Together and Mark

Finally, I refolded the binding and completed the seam.  Here’s how the multi-colored binding looks on this quilt.

Multi-Colored Binding

Here’s a close-up of the wave stitch quilting.  I used Valdani Sunny Rainbow variegated cotton thread.

Wave Stitch Quilting

And so ends another happy quilt adventure.  Of course, I’ve already begun cutting out my next project.

Have a great 4th of July holiday.

Nancy

Read Full Post »

Proverbs 4:23

Another project comes to a happy ending.  I decided I wanted rounded corners on this feminine quilt so I used my circular template to mark the curves.  The markings helped guide the free motion quilting.

Rounded Quilt Corners

Marking Quilt Corners

After choosing the fabric for the binding, I cut 2 1/8” strips on the bias.  Bias-cut binding is necessary whenever you’re dealing with curves.  I simply eased my way around the corners, being careful to follow the quilt’s edge.

Attaching Binding to Quilt Corners

Easing the Binding Around Curved Corner

As you can see, I cut off the excess edges of the batting and backing before attaching the binding, leaving about 1/8” beyond the quilt top.  Pre-cutting isn’t necessary but I think it helped visually when navigating the corners.

And here she is.  I actually named the block Meet You in the Middle owing to the four patch that is created when the four differing blocks come together, but the name appears to fit the finished quilt as well with all the four patches forming an X.

Completed Quilt

Meet You in the Middle Quilt

Here’s a close-up of the free motion quilting.  I love the overall effect of this pattern.

Free Motion Quilting

Free Motion Quilting

I’m not sure what’s next, but I think it may include some flying geese.

Hope you get some quilting done this weekend.

Nancy

Read Full Post »

I applied double-fold bias binding to finish the edges of my quilt.  I really don’t have a binding preference on square or rectangular quilts.  Bias cut or straight of grain both work well.  If my corners were rounded or edges scalloped, I would definitely use bias binding.

Quilt Binding

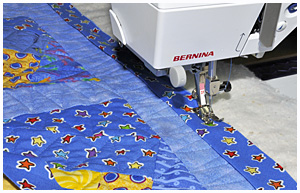
Applying Double-Fold Binding to Quilt

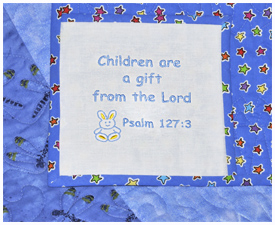
The final step before I could call the project complete involved embroidering a quilt label.  I wanted something a little smaller for this quilt so I chose a simple bunny design.  As you can see, I used some of the leftover binding to frame the label.

Quilt Label

Little Bunny Quilt Label

I want to mention one more thing regarding free motion quilting.  An even rhythm (hand movement in sync with machine speed) produces even stitches.  If you move your quilt too slowly, your stitches will be too small and possibly bunch up.  Conversely, if you move your quilt too quickly, your stitches will be too large.  Both practice and warm up really help you to find the right balance.

Free Motion Quilting Stitches

Work Toward Even Free Motion Stitches

In the planning stage, try to find designs that flow nicely without too many starts and stops.  Sometimes it’s fun to take traditional quilting designs and convert them for free motion quilting.  As you draw them out on paper, it’s helpful to use numbers for the starting point, direction, and stopping point, simplifying them as much as possible.

I have lots of quilts floating around in my head and look forward to sharing the adventure with you.

Completed Quilt

A Happy Ending

Nancy

Read Full Post »

1 Peter 5

Whenever I machine quilt, I remove the general throat plate and replace it with a straight stitch plate.  I know these aren’t available for all machines, but if one is available for your brand of sewing machine, I do recommend purchasing it.

With the feed dogs lowered and the straight stitch throat plate in place, I then cover the bed with a Sewslip.  The Sewslip and Super Slider are non-stick surfaces with holes under your machine needle.  They have a tacky backing that keeps them in position.  Anything that will eliminate drag on your quilt while it’s under the needle is helpful.  I’ve been using one for years, and I do think they make machine quilting a little easier.

Sewslip

Next, I turn on my sewing machine and lessen the presser foot pressure.  Every machine does this differently so read your manual for instructions.

Pressure Foot Pressure

Lower Presser Foot Pressure

With my machine set, I now take a little time to warm up by using a sample quilt sandwich made for this purpose.  You don’t want to skip this step.  It allows you to test your stitches to make sure they are balanced.  Also, your head and hands get a chance to change into quilting mode before you actually beginning stitching your quilt.

Free Motion Quilting

Free Motion Warm Up

The last thing I do before beginning to machine quilt is apply Tri-Flow to my machine needle using a Q-Tip.  Since I use 505 Adhesive Spray to “baste” my quilt sandwich, I don’t want any skipped stitches.  This brand of spray is pretty good at not gumming up your needle, but I still like some extra insurance.  Tri-Flow puts a Teflon coating on the needle and insures against the build-up of gummy residue.

Apply Tri-Flow to Needle with Q-Tip

I position my quilt somewhere in the middle section and pull my bobbin thread to the quilt surface, leaving enough thread tails to pop back into my quilt later.

Bobbin Thread

Pull Bobbin Thread to Surface of Quilt

I know that most people make a few securing stitches at their starts and stops; I’m just not one of those people.  It goes back to my hand quilting days.  I don’t like the look of thread buildup, so I use self-threading hand needles, form a single knot, and feed the thread into the batting until it pops.  Yes, it takes an extra minute here and there, but it’s worth it to me.

Knot Thread and Pop Back into Quilt

For easier maneuverability, I roll the side of my quilt that falls to the right of the needle.

Roll Quilt

Roll Quilt to Right of Needle

I also keep the front and back of the quilt loosely bunched to prevent drag as I’m stitching.  The bed of my machine is even with the sewing table so this is most helpful in the area between me and the machine.

I mentioned in a previous post that music can be an aide to machine quilting.  I believe it relaxes you and helps you to form a smooth rhythm with your quilt as you move it under the needle.

And speaking of the quilt being under the needle, I focus my attention on a small area as I quilt.  Sometimes I make a taut “U” shape with my two hands; other times I might use a quilting hoop made for machine quilting.  My eyes are always looking ahead to where my needle is going next.  And this brings me  back to free motion presser feet.  Some are better than others when it comes to vision, so give them a test drive before making a purchase.

I hope you find something helpful to take away from this post.  But the one thing I can’t help you with is practice.  Practice is the key to successful free motion quilting. Practice makes progress.  Maybe someday practice will be the cure to my butterflies.  Maybe.

Free Motion Quilting

Free Motion Quilting Completed

Happy quilting!

Nancy

Read Full Post »

John 14

I was a hand quilter for years and still love the look of all those little hand-worked stitches.  For me, hand quilting was peaceful and relaxing.  However, I never finished hand quilting an entire quilt top, not even a baby quilt, in one day.  Yesterday, I free motion quilted the Right Inclination quilt and had it finished before dinner.  I believe the popularity of machine quilting is in large part a matter of numbers.  We all have a head full of quilts we want to make and a limited amount of time in which to make them.  Machine quilting makes our goals more reachable.

I confess, as much as I enjoy free motion quilting, I tend to have butterflies in my stomach every time I reach this stage in the quilt making process.  I’m the perfectionist type, which is probably at the root of my nervous stomach.  After a half hour or so, I’m as comfortable as can be and totally lost in the rhythm of my hand movements.  Do any of you have the same experience?

There are many techniques as well as helpful products for free motion quilting.  You can make it as simple or as complex as you like.  This is one area where you will profit from lots of experimentation.  Here is how I do it.

Machine Quilting Supplies

First, I set out all the equipment that I will be using for the particular quilt I am making.  These may include the following:

Quilting gloves or rubber fingers

Quilting needles

Sewslip or Super Slider

Straight stitch plate for sewing machine

Quilting thread and bobbins

Free motion presser foot

Quilt So Easy hoops

Tri-Flow lubricant and Q-Tip

Quilt markers

Quilt stencils and shape templates

Chalk Marking Spray

Self-threading hand sewing needles

Sometimes I mark my quilt top and sometimes I don’t.

Marked Quilt Top

Whenever I’m shopping, I keep my eyes open for unusual items that might work well as marking templates.  Craft stores sell wood cutouts in various shapes that work well.  I’ve also found plastic layering templates made for fleece that I like.  Chalk marking spray and quilting stencils are another option.

Quilt Marking Supplies

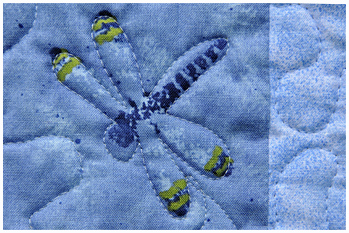
Sometimes the print of your fabric lends itself to quilting, which was the case on the dragonfly borders of Right Inclination.  It doesn’t get any easier than that.

Fabric Print Provided Quilting Motif

The main thing to concentrate on is a plan.  Give some thought to your quilt design and the type of quilting that would compliment it.  Sometimes I draw out a motif and practice it with my hands before actually attempting to quilt it with the machine.  I often use a mix of motifs and shapes.  I also take into consideration the type of batting I’ve used and how close the stitches need to be.  Remember, quilting shrinks the layers as they’re being stitched.  Plan for this by evenly quilting your entire project.

Once my quilt top is ready, I then prepare my sewing machine.  Every machine has a different feel to it.  Additionally, the various free motion presser feet make a difference.  After a little experimentation, you will gravitate toward one or two that you like.  At present, I like the clear Big Foot combined with my Bernina machine.  A year from now it may be a different combination.

Free Motion Presser Feet

I choose my needle according to the thread I will be quilting with.  I’ve actually made a chart of needles, threads, and upper machine tensions that work well on my machines.  It’s a handy guide to have around so that I don’t waste time with each new project.

My Thread-Needle-Tension Chart

Normally, I use the same weight thread in the needle and bobbin except when using monofilament thread.  One of my favorite quilting needles is made by Schmetz.  Look for the word quilting on the cover and the green band on the needles.  (All of their needles are excellent.)  Whatever brand you use, make sure it has a sharp tip.

Machine Quilting Needles

Machine Quilting Needles

In the second half of this post on free motion quilting, I will share some more products and techniques that I use and find helpful.

Happy quilting,

Nancy

Read Full Post »

I was introduced to a product named Tri-Flow years ago on an embroidery forum.  If you experience skipped stitches when using fusibles or sprays, you will welcome this product into your sewing studio. I find it especially helpful when using the Bernina BSR attachment since this little accessory is very fussy when it comes to adhesives.

Tri-Flow Lubricant

Tri-Flow is also a great aide when doing free motion work at high speeds since it eliminates friction. Using a Q-tip, apply a thin coat to your sewing machine needle from top to bottom. I usually need to recoat the needle several times during the course of the project when fusibles or adhesives are involved.

Apply Tri-Flow to Needle with Q-Tip

Tri-Flow is advertised for bicycles, bearings, and movable parts on machinery.  However, many sewing machine technicians use this product in their workshops. For home use, Tri-Flow can clean and lubricate your bobbin area (metal parts) as well as remove dirt and dust from the surrounding surfaces. It also displaces moisture and prevents corrosion, which means you can use it on the core of metal bobbins before winding them with thread.

One caveat:  Tri-Flow is NOT sewing machine oil. Follow your manufacturer’s instructions and only use the sewing machine oil recommended in your manual.  Many modern machines do not require oiling.

Look for this product in bike shops, online, and at some sewing centers. For the uses I’ve listed above, purchase the 2 ounce fluid (not the spray).

nrw

Read Full Post »

When you purchase a new sewing machine, it normally comes with a  standard stitch plate that accommodates the widest stitch width your machine is capable of, such as 5.5 mm, 6.0 mm, 7 mm, etc.  For general sewing purposes, this is the plate I keep on my machines most of the time.

Standard Stitch Plate

For piecing and quilting, however, I highly recommend that you purchase a straight stitch plate for your particular brand of sewing machine.  The straight stitch plate aides in the formation of straight stitches by providing support for the fabric as the needle pierces through it at a high speed.  With such a small entry hole for the needle, the fabric stays flat rather than being pushed down into the wider opening of the standard stitch plate.

Straight Stitch Plate

This may seem like a small thing until you begin free motion quilting.  Have you ever wondered why the stitches on the back of your quilt look as if they pulled the top thread too tightly?  This often happens when creating circular or wavy patterns during the free motion process.  The straight stitch plate cured this problem for me and made a big difference in my stitch quality.

I do need to warn you about one thing.  Make sure you use the middle needle position and only the middle needle position with this stitch plate.  Some machines allow you to lock this needle position so that you don’t break your needle or damage the plate by switching to a zig-zag or other width stitch.  Other than that, this is a great accessory for quilters.

nrw

Read Full Post »

Proverbs 3:18

Our quilt tops are complete, our quilt sandwiches are prepared, and now we’re ready to begin machine quilting.  If you haven’t already, take a few minutes to read about the walking foot attachment (even feed foot) that is available for your sewing machines.  This tutorial explains basic machine quilting using a straight stitch with the feed dogs in the up position.

The first thing I do is set out my quilting supplies.  There are many helpful, time-saving quilting aides on the market that you can explore.  For beginners, all you need are a few basic items.  These include 100% cotton thread (or other quilting thread of choice), quilting gloves or rubber finger tips, quilt markers, machine quilting needles, embroidery scissors or thread clippers, and a music CD.

Quilting Supplies

Once you’ve decided on a thread, choose your needle accordingly.  I normally use a 90/14 quilting needle with cotton quilting thread.  Quilting needles have sharp tips that easily penetrate the three layers of your quilt.  They also have slightly larger eyes.

Quilting gloves have small gripper dots that help to control the movement of the quilt along the bed of the machine.  In the summer months, I find these gloves rather uncomfortable, so I use rubber finger tips from the office supply store.  Some quilters purchase garden gloves with gripper dots.  Choose whatever product works best for you.  Although these aren’t essential, they are very helpful.

Machine quilting can easily produce tension in the shoulder area, especially when you’re new at it, so I recommend listening to relaxing music as you quilt.  Additionally, stop every few minutes and relax your neck and shoulder area.  Do a few gentle stretches and then continue.  Take a break about every 20-30 minutes so that you can rest your eyes.

If you’ve decided on a grid design rather than quilting in the ditch, you will now want to lay your quilt sandwich on a level surface and mark it.  I like to use a chalk marker that can be dusted off easily.  In the photo below you can seen my diagonal chalk lines marked on the surface of the quilt.  If your walking foot included a guide, you can skip this step and use that instead.

Mark Your Quilt Top

Once your quilt top is marked, take it to the sewing machine.  Set the stitch length to 3.0 or 3.5.  It’s a good idea to start with a full bobbin.  Roll both sides of the quilt toward the center so that the quilt can move freely along the bed of the machine.  As you begin stitching, keep the quilt loose in front of you so that is doesn’t hang down, producing resistance to the forward motion of the feed dogs.

Roll Your Quilt for Ease of Movement

I normally sew two stabilizing rows that cross each other in the center of the quilt, forming the shape of a cross if stitching in the ditch, or an X if doing diagonal grid quilting.

Quilt Two Stabilizing Rows

After quilting these two rows, remove the quilt from the machine and check the back for puckers.  Also check the thread tension on the front and back of the quilt.  You want smooth, even stitches.  Smooth your quilt top and continue.

Check Back for Puckers

From there, continue to work from the center outward.  Check the back of your quilt frequently to make sure there are no puckers forming.  Once all your rows are stitched, sit back and enjoy a job well done.

Completed Quilting

Note:  Sometimes thread breaks as you’re quilting no matter how careful you are.  Here is how I handle the situation.  I remove the quilt from the machine and loosen enough of the stitches to form a thread tail.  Using a self-threading needle,  I pop the tail into the eye and then form a single knot just as I would if I were hand quilting.  I then put the tip of the needle into the last stitch and slide it into the quilt sandwich until the knot becomes embedded and the thread tail is hidden in the batting of the quilt.  I repeat this on the back of the quilt as well.

Next, I reposition the quilt under the needle and begin sewing at the exact point of the last stitch.  When you’ve completed the row, go back and repeat the above method to hide the tread tails.

Yes, this takes a little extra time, but it is the best way to keep your quilt stitches neat and tidy.   No one will ever know you had a thread break if you use this method.

nrw

Read Full Post »

Older Posts »