Feeds:
Posts
Comments

Archive for the ‘Baby Quilts’ Category

Ecclesiastes 3:11

To complete the X-Box quilt top, I chose quarter-square triangles for the alternate blocks because I like the secondary design they produce.

Quarter-Square Triangle Block

You can follow my Quarter-Square Triangle tutorial to construct the four alternate blocks, plus the X-Box, Part Two tutorial for the block border.

First, make four quarter-square triangles.

Make Four Quarter-Square Triangle Blocks

Add borders to each block.

Position all your blocks in sewing order. Sew the blocks together in groups of three. I find it helpful to pin where seams need to match up.

Press the new seams of each row so that they butt up against the seams of the row they will be sewn to. For example, first row pressed to the right; second row pressed to the left; third row pressed to the right.

Sew the rows together. (I pressed the row seams open to distribute the bulk.)

Sew Rows Together

Add a contrasting border if you like.  My outer border measured 3 inches.

Add an Outer Border

Press the quilt top carefully, put together your quilt sandwich, and quilt as desired.

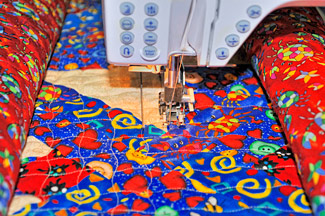
I quilted X-Box in a close diagonal grid pattern, using a wavy stitch and Valdani 50 wt. cotton thread (Color 6).  The stitching is about an inch apart.

Grid Quilting

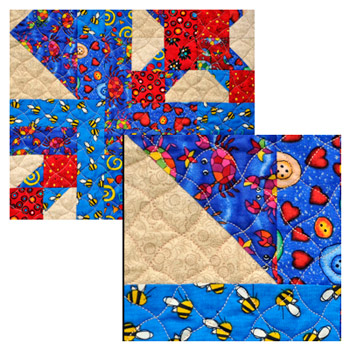
Here’s a close-up of the quilting.

Closeup of Quilting

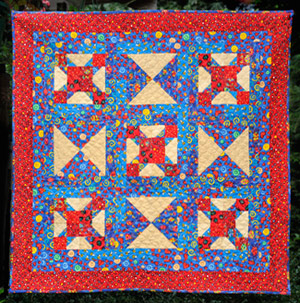
Another happy ending with a colorful quilt for a little boy (or girl).

X-Box Quilt

It’s seems so effortless to make quilts for girls since most fabrics just “work.”  Boy quilts, on the other hand, take a little more planning on my part.  Have you found this to be true?

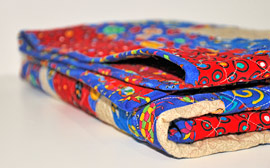
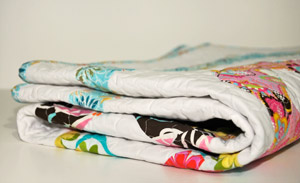
X-Box Quilt Folded

Have a great week of quilting!

Nancy

Read Full Post »

Psalm 139:17-18

This quilt was a delight to make from start to finish.  Constructing the blocks proved the most fun since they consisted of such beautiful, colorful fabrics (many of them by Michael Miller).

Cheery Oh Quilt

Once my center section was complete, I added a 1 ½-inch print border to frame it.

Added Print Border

Next, I added a 3-inch outer white border.  I used the same print fabric for the binding as I used for the inner framing border.

Added White Outer Border

To make my first quilting lines, I used a Hera marker.  This is a handy little tool to have around since it creates a very visible path without leaving any residual effects.  I find it works best on solid or solid reading fabrics.

Hera Marker Quilting Lines

Hera Marker

Hera Produced Marking

Since the blocks were placed on point, I quilted the top with a close horizontal and vertical grid pattern using a small wave stitch.

Here’s a close up of the quilting.

Grid Quilting

And so another happy ending that leaves me with the question of what quilt I want to make next.

Cheery Oh Quilt Folded

Joyful quilting!

Nancy

Read Full Post »

Psalm 121:1-2

In part one of this tutorial, I demonstrated how to construct the Cheery Oh quilt block.  It’s a very simple as well as fun quilt block to make. Although you could use print fabrics for the background units of the “O” shape, I really like the pristine appearance of solid white surrounding the focus points of these colorful blocks.

I made the design choice of setting the blocks on point.  That means there is a need for setting triangles and corner triangles in order to complete the quilt top.  If you’re new to the on point design setting for your quilt blocks, the diagram below may help.  Of course, you can always choose a horizontal block setting and still produce a beautiful quilt with the Cheery Oh blocks.

Setting and Corner Triangles

Setting triangles (sometimes called side triangles) and corner triangles do add more complexity to the construction of a quilt, but setting blocks on point can really introduce variety to your quilt designs and produce increased visual interest.

Yes, there’s math involved unless you purchase a specialty ruler sold for this purpose.  But it’s similar to doing the math for half-square and quarter-square triangles, with a little multiplication and division added.  In fact, I prefer the math method for making setting triangles over the ruler method, but I’m getting ahead of myself.  Grab your calculator for the following steps.

You will be using the calculation below to arrive at the size square you need to produce two corner triangles.

Formula for Corner Triangles

Size of finished block  ÷  1.414  +  0.875″

Round up the number this calculation gives you to the nearest 1/8″ (0.125) and cut a square this size. For example, my finished block measures 7 1/2″.   7.5 ÷ 1.414 = 5.304 + 0.875= 6.179.  Rounding it up gives me 6.30 so I will cut my square about 6 3/8″.

Divide the square in half by cutting it diagonally, corner to corner.  Repeat this step for the remaining two corner triangles needed.  Rounding up is important because it adds a comfort zone to the size of the triangles, taking care of the rollover effect at the seam allowance.

If math is a scary thing for you, there are rulers on the market that simplify this step.  I have the Diagonal Set Triangle Ruler by Marti Mitchell.  I prefer it over the math method for corner triangles.  You simply find the size marking on the edge of the ruler for your finished square and cut the triangles needed.  It’s a handy tool not only for on point quilt settings but also for Square in a Square blocks.

Diagonal Set Triangle Ruler

Formula for Setting Triangles

Size of finished block × 1.414  +  1.25″

Round up the number this calculation gives you to the nearest 1/8″ (0.125) and cut a square this size.  For example,  7.5  x 1.414 = 10.605 + 1.25 = 11.855.  I rounded the number to 12″ for my square.  In the case of these triangles, better a little larger than too small.

Cut Square for Setting Triangles

Now position a ruler diagonally from corner to corner and cut the square in half.

Cut Square in Half Diagonally

Without moving the two triangles, reposition the ruler diagonally at opposite corners and cut in half again.

Cut in Half Again

You now have four setting triangles.  Repeat this step until you have as many triangles as your quilt top requires.

Four Setting Triangles

I mentioned earlier that I prefer the math method for this step.  The ruler method is fine; you just cut one side of the triangle and then flip the ruler over to cut the other side.  Personally, I find quartering the square easier.  Which method you use is entirely up to you.

Now take all your blocks and triangles and place them in sewing order.  I usually do this on my bed.  You have a couple of choices to make at this point—sew the rows together diagonally or sew the four corner units and then sew the center blocks together.  I like the second choice and that is how I constructed the quilt top.

Position Quilt Units in Sewing Order

Sewing the corner units together first for this particular quilt takes care of all the setting and corner triangles.  I find the units of the quilt are easier to manage this way.

First, sew the two setting triangles to the corner block.  Second, fold the corner triangle in half and finger press a small crease line at the center edge.  Do the same with the block unit.  Pin the corner unit to the block unit at the center point, right sides together.

Crease and Pin Center

It’s now easy to sew the corner triangle to the block unit with it perfectly centered.

Sewing the Corner Triangle to Corner Unit

After you’ve constructed all four corner units, begin sewing the center quilt blocks together in groups of three.  Match up and pin each of the seam intersections.  Next, sew the three rows together in the same manner.

Sew Blocks in Groups of Three

Position all of the sewn quilt units in order.  Sew each corner unit to the center quilt block unit, pinning at seam intersection.

Sew Corner Units to Quilt Top

You now have the main section of your quilt top completed.  Notice the secondary square and diamond shapes that the on point design has produced.  I love this setting!

Cheery Oh Quilt Center

If you’ve never attempted to place your quilt blocks on point, I hope you’ll take a deep breath and give it a try.  Like so many first-time experiences, you’ll feel a little unsure of yourself as you‘re cutting all those triangles, but soon you’ll be right at home with the process.

I’m now ready to work on the quilt borders so off I go.

Happy quilt designing,

Nancy

Read Full Post »

Psalm 119:89-90

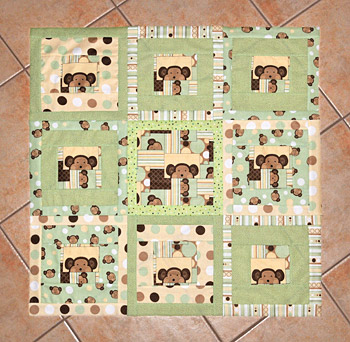
With a quilt like Monkey See, the fabric served as the focus.  All that was required was a simple design that accentuated the cute little monkey faces.   I can foresee some little boy or girl adopting this “blankie” as their best bedtime buddy.
Monkey See Quilt

I grid quilted using a 5.0mm tight wavy stitch.  Valdani cotton quilting thread (50 wt.) was used on the front and back.  I really like the diamond pattern that this produced.

Grid Machine Quilting

It’s going to be difficult letting this one go!  I’ve thoroughly enjoyed keeping company with all those sweet little smiling faces.

Monkey See Folded Quilt

However, the fabrics are already pulled from the shelves for my next quilt.  I’ve even drawn the design in my quilt software.  Hopefully, I’ll have a rotary cutter in hand by this evening.

Happy quilting.

Nancy

Read Full Post »

Psalm 144:8-9

If you’ve followed some of my tutorials, the method for constructing these Monkey See blocks will be familiar.  They are super easy and fast to make.  You will need a novelty fabric that you can fussy cut for the center of the blocks.  This tutorial makes nine blocks, enough for a baby, wall, or lap quilt.

Monkey See Blocks
First, fussy cut eight 4 ½” center blocks.

Fussy Cut Centers

Cut eight rectangles 4 ½” x 5” from contrasting fabrics.  I used four fabrics so I cut two rectangles from each one.

Beginning with the 4 ½” squares, sew a contrasting fabric (right sides together) to each one by sewing down two sides.  The rectangles will be a little larger than the squares as you are sewing.

Sew Two Sides

Shift the tubes you’ve created and quickly match up the seams.  Finger press a fold line in the contrasting rectangle.  Cut along the fold line and finger press open.

Cut Fold Line

Cut eight 5” x 8 ½” rectangles from the same contrasting fabrics.  Place each rectangle on top of the previously sewn units, matching the contrasting fabrics.  Sew down the two sides perpendicular to the previous seams.

Sew Sides Perpendicular to Seams

Shift the tubes and match the seams.  Finger press a fold line in the contrasting rectangle and cut as shown.  Press.

Cut Fold Line

Your blocks should measure 8 ½” square.

Measure Blocks

Cut eight strips 1 ½” x 42” (the approximate cross grain measurement) from the same four contrasting fabrics.  Sew strips around each of the four blocks, using one of the contrasting fabrics that doesn‘t match the particular block you’re sewing it to.

Sew Strips Around Four Sides

Press open.

Press Strips Open

Your finished blocks should measure 10 ½” square.  Square up if necessary.

Now cut one 8 ½” square from your novelty fabric.  Cut one more strip 1 ½” x 42”.  (I used a fifth fabric that I will be using for the borders.)  Sew the strip around the block and press.  This will be your center block as you arrange your blocks in rows of three.

Sew Strips Around Center Block

Sew your blocks together and then sew your rows together.

Sew Blocks Together

Here is my quilt top so far.  I plan on adding a 5” border.  Aren’t those little monkeys cute as can be?
Monkey See Sewn Blocks

Have a great weekend,

Nancy

Read Full Post »

Psalm 144:3-4

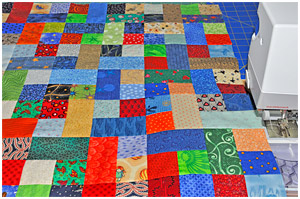
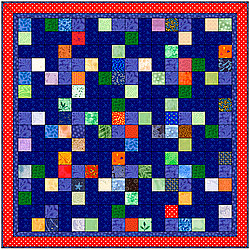
I really enjoyed piecing this quilt.  The little Crossroads blocks are fun to make and offer the opportunity to use a large number of fabrics, giving the quilt a scrappy look.

Crossroad's Pieced Blocks

Don’t you love looking at all the various fabrics in a scrap quilt?  This one has a sampling from shopping trips that cover at least a decade or two.

Crossroads Scrap Quilt

I added a 1 ½” dark blue frame around the center and then a 5-inch red border.  Using Valdani Vibrant Reds cotton quilting thread (50 wt.), I grid quilted the center block section.  Next, I quilted small scallops on the edges of the blue frame along with a wavy stitch in the center.  On the red border, I quilted a larger scallop pattern around the inner edges and then finished the border with overlapping “peaks.”

Crossroads Quilting and Borders

For the binding, I cut multiple strips from some of the dark blue fabrics I had used in the blocks.  A multi-fabric binding usually works well with scrap quilts.

Crossroads Quilt Binding

I made my first cuts into the monkey fabric early this morning.  Yes, a little painful but fun all the same.

Hope your week is filled with quilting.

Nancy

Read Full Post »

Psalm 119:89-90

The Crossroads quilt block is a super simple little block that can stand on its own in a scrap quilt, join other units to form a framed block or whirly-pinwheel design, or serve as the core of various log cabin blocks.  Crossroads can probably do even more than I’ve listed, but that’s as far as my thinking has taken me this week.

Crossroads Scrap Quilt

The block is comprised of a rectangle and two squares, certainly nothing unique.  However, my sew and cut method of constructing it is a little different and makes the process fast, accurate, and enjoyable.  This is the perfect quilt block for using up all those scraps you have saved.

Crossroads Whirl Quilt

First, cut two 4 ½” squares from different fabrics.

Cut Two Squares

Place the squares right sides together and sew two parallel sides, using a quarter-inch seam allowance.

Sew Two Parallel Sides

Cut the unit in half.

Cut Unit in Half

Finger press the two units open.  The units measure 4” x 4 ½”.

Finger Press Units Open

Cut two 4” x 4 ½” rectangles from contrasting fabrics.

Cut Contrasting Rectangles

Place the rectangles on top of the units, right sides together.  Sew down two sides, perpendicular to the seam.

Sew Sides Perpendicular to the Seam

Cut the units in half and finger press open.  You now have two Crossroads blocks that are mirror images of each other.  The blocks should measure 4” square.

Cut in Half Again

For a scrap quilt, I position my blocks with the rectangles in the center.  This isn’t necessary, but I like the effect.

Position of Blocks

For a whirly-pinwheel quilt, I make all my rectangles the same color and position them in the center as well.

Position of Blocks for Whirly Design

In part two of this tutorial, I’ll show you how to use the Crossroads block as the core of a Courthouse Steps block along with my super simple way of constructing this traditional log cabin block.  I love log cabins!  The third quilt I made as a new quilter was a queen size log cabin quilt that I still snuggle under while hibernating in the winter time.  For me, it’s the equivalent of comfort food.

Happy piecing,

Nancy

Read Full Post »

Psalm 119:1-2

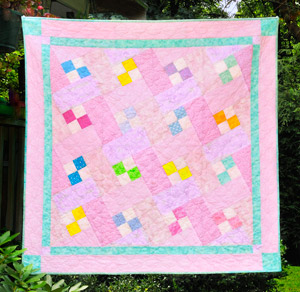
I spent last week enjoying the company of my two oldest grandchildren, ages 5 and 6.  My granddaughter loves dressing dolls, including paper dolls, which gave me an idea for a quilt.

While working on the Quarter Turn blocks the week before, I also had another block idea pop into my head and got a little side-tracked with it during the quilting process.  All that to say, I missed posting last week.  But I’m pleased to report that I finished the Quarter Turn quilt this morning.

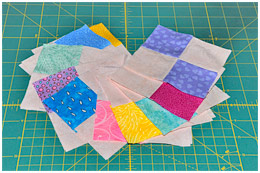
Quarter Turn Quilt

After sewing all the Quarter Turn blocks together, I added a small framing border and then a larger pink border with corner squares.  I used Valdani variegated Baby Joy cotton thread (50 wt.) on the front of the quilt and a solid pink cotton thread on the back.

Valdani Baby Joy Cotton Thread

I alternated the turquoise and green prints for the binding.

Quilt Binding

Here’s a close-up of the quilting.

Wave Stitch Diagonal Grid Quilting

I love this quilt and know it will make some little girl very happy.

Hope your week is filled with quilting.

Nancy

Read Full Post »

Isaiah 46:4-5

In part one of this tutorial, I showed you two different methods for cutting out the Quarter Turn block.  Now we’re ready to begin sewing the block together.

Quarter Turn Quilt Block

First, let me share a few helpful observations regarding the construction of this block.  I mentioned previously that you would be working with bias edges.  The bias edges are on the inside of the block and are the edges that you will be sewing to the center four-patch unit if you use the template method and mark the straight-of-grain on the side opposite the right angle (hypotenuse).

If you use the second method, cutting your pieces from rectangles, the outside edges will be on the bias.  Treat them accordingly and remember that spray starch serves as a great ally with bias edges.

Second, you will need to position your triangles correctly as you sew them to the four-patch unit.  In the diagram below, you can see that the 90 degree right angle corners are adjacent to the edges of the four-patch.  The right angles make a quarter turn around the block, which accounts for the block’s name.

Right Angles

Complete sewing the four-patch unit.

It is helpful to set your block pieces in sewing order before you begin so that all goes smoothly.

Set Block Pieces in Sewing Order

Beginning with the #1 bottom triangle, flip the unit over onto the four-patch, right sides together.  Sew a partial seam, stopping about halfway.  Remove the sewn unit from your sewing machine and finger press open.

Sew Partial Seam on Triangle #1

Place the sewn unit back into place with the remaining triangles and flip #2 triangle over onto the four-patch, right sides together.

Flip Triangle #2 Over and Position in Place

Pin in place and sew the entire seam.  Finger press open.  (I recommend pinning in place since you are sewing a bias edge.)

Sew Triangle #2

Place the sewn unit back into place with the remaining triangles.  Flip #3 triangle over onto the four-patch, right sides together, and pin in place.

Flip Triangle #3 Over and Position in Place

Sew the entire seam.  Finger press open.

Fold triangle #1 back onto itself.  Flip the final triangle, #4, over onto the four-patch unit, right sides together.

Fold Back Triangle #1 to Position Triangle #4

Pin in place and sew the entire seam.  Finger press open.

Sew Triangle #4

Now fold the #1 partial seam triangle back onto the four-patch unit.  Complete the seam.

Fold Back Triangle #1

Press your completed block and square up if necessary.  That’s it!

Isn’t this a beautiful quilt block?  I’m in the process of making sixteen of these that should come together into a quilt top that look’s something like the graphic in part one.  I chose to pepper the quilt with color via the four-patch units, keeping the surrounding triangles in pastels.

Four-Patch Quilt Blocks

Happy quilting,
Nancy

Read Full Post »

Isaiah 41:10

A new week, a new quilt project.

Quarter Turn Four Patch Quilt

I’ve always liked the symmetry of this quilt block and wanted to use it in a quilt.  I would consider it an intermediate block since it involves a partial seam as well as a four-patch center unit.  It also involves sewing bias edges.  However, it’s not a difficult block to construct and is well worth the effort.

There are two ways to go about making this block.  One involves using templates and the other your quilting rulers.  I will show you both methods.  Your finished block will measure 9”.

For the template method, draw a 4” x 8” rectangle on a plain piece of paper.

Draw 4" x 8" Rectangle

Place your ruler diagonally from corner to corner as shown and draw a line that divides the rectangle in half.

Draw Diagonal Line from Corner to Corner

The bottom right triangle will be the pattern for your template.

Bottom Triangle

Draw quarter-inch seam allowances around the triangle.  Cut the pattern out and transfer it to template plastic.  Cut out your template.

Draw Quarter-Inch Seam Allowance Around Triangle

For the ruler method, your will either cut two or four rectangles, depending on whether you want your surrounding triangles all the same color or four different colors.

All triangles same color:

Cut two (2) rectangles 4 ¾”  x 9 ¼”
Position a quilting ruler diagonally from corner to corner and cut into two triangles.  You should have four triangle units.

Position Ruler Diagonally Corner to Corner

Four different colored triangles:

Cut four rectangles 4 ¾”  x 9 ¼”,  one from each of your four fabrics.
Position a quilting ruler diagonally from corner to corner and cut each rectangle into two triangles.  You should have eight triangle units (four extra for another block).

Cut Into Triangles

Your center four-patch measures 4” finished and 4 ½” with raw edges.  You can use your quilting ruler for this unit.  I have an Olfa 4 ½” ruler that makes it really easy to square up my four-patches.  (I love the Olfa frosted quilt rulers!)

For a super easy four-patch method, see my sew and cut tutorial.

That wraps up the cutting plan for this block.  In part two, we’ll begin sewing the block together.

Nancy

Read Full Post »
Older Posts »